
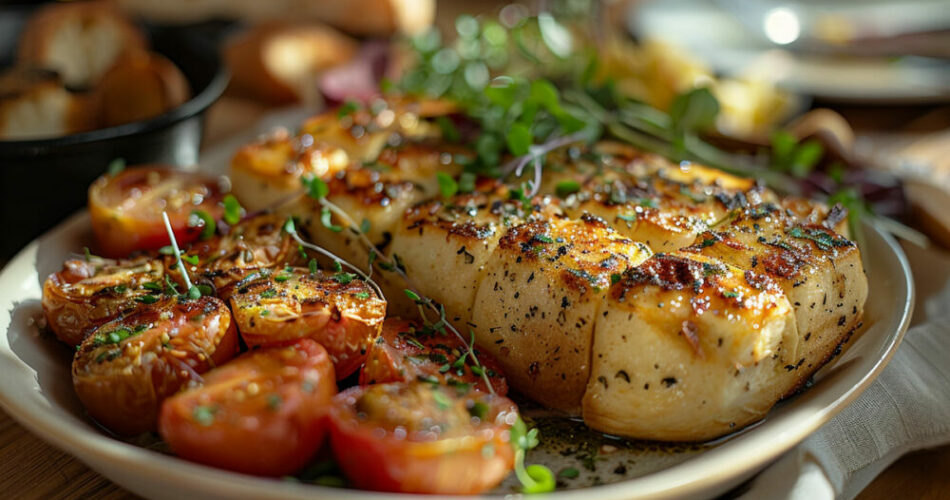
Imagine the sizzle of butter as it meets a warm pan, the aroma of freshly minced garlic wafting through your kitchen. It’s not just cooking; it’s an art form, transforming a simple Costco garlic bread into a golden, delectable treasure.
Fifteen years of whisking and sizzling have taught me this — great cooking is about simplicity and the magic of the right technique.
In this read, you’ll unravel the secrets to perfectly baking your garlic bread, a recipe passed down in whispers among culinary circles, now shared openly with you.
From the perfect bake time to the delicate balance of Italian seasoning, you’ll emerge an artisan of the oven, adept at crafting a crisp yet tender masterpiece.
Step-by-step, I’ll guide you — no culinary stone left unturned. Whether it’s a lush parsley garnish or a homemade garlic butter revelation, what lies ahead is a voyage through the peaks and valleys of home cooking.
Soon, you’ll confidently pull your creation from the oven, a testament to the skill you’ve proudly honed.
How To Cook Costco Garlic Bread: The Quick Version
To cook Costco garlic bread, you can follow these simple steps:
- Costco Kirkland Signature Garlic Baguette:
- Remove the garlic baguette from the packaging and place it on a baking tray.
- Heat the oven to 375°F.
- Bake the garlic bread for about 20 to 25 minutes.
- Enjoy the crispy outer edges and chewy inside of the bread with a strong butter flavor and a mild garlic taste.
- Texas Toast Garlic Bread with Real Garlic:
- Preheat the oven to 425°F.
- Place the slices flat on a baking sheet with edges.
- Bake at 425°F for 8-10 minutes on the middle shelf of the oven.
- To brown both sides, turn over and bake for an additional 2 minutes.
Preparing to Cook Costco Garlic Bread
Understanding Your Options
There’s always more than one road to your destination, isn’t there? The same goes for how to cook Costco garlic bread. Some swear by the convenience of the freezer aisle, others find joy in crafting their loaves using Costco’s vast ingredients aisle.
- Frozen: Quick, convenient, a life-saver for impromptu gatherings; but let’s admit, sometimes you crave the freshness only the latter can provide.
- Pre-packaged vs. from scratch: Consider time, effort, and your personal touch. The former is about efficiency, and the latter, about infusing your own blend of soul and flavor.
Essential Tools and Ingredients
Any maestro needs their baton, so here we talk about the batons of bread-making.
- Kitchen tools go a long way. A sturdy baking sheet, a reliable brush for your butter, a good quality knife – these are stalwarts in this culinary concert.
- Ingredients are key. Fresh herbs, think rosemary, or perhaps a mix of cheeses, can take a simple loaf to a new stratosphere of taste.
Pre-Cooking Preparations
Before the aroma of garlic fills the air, consider these:
- If dealing with a frozen loaf, patience in thawing rewards with even cooking.
- Preheating sets the stage. 350 degrees, give or take, and you’re setting up for success.
Cooking Techniques and Methods
Baking
This is where the magic happens. Baking is more than just a method; it’s the heart of the matter.
- A traditional oven offers the tranquility of convention, a step-by-step ritual that ends with the breaking of the most delicious bread.
- Achieving that perfect crust is a dance — know when to be gentle, know when to turn up the heat.
Grilling
Let’s turn up the heat, shall we?
- Grilling adds a smoky signature, a whisper of the outdoors right there on your plate.
- Control that fire, keep it tame, and dodge the common pitfalls of charring what you treasure.
Broiling
Under the broiler, garlic bread becomes a quick thrill, a crispy treat.
- Embrace the speed but respect the heat. Broil, but never stray too far — vigilance is a virtue here.
- Safety isn’t just a word; it’s your kitchen philosophy. Keep your bread in sight, keep the char at bay.
Alternative Methods
For those who color outside the lines:
- Air frying may seem like modern witchcraft, but it’s a healthier twist to an old tale.
- Toaster ovens convince with convenience and are a testament to the versatility of modern life.
Customization and Flavor Enhancements
Custom Toppings and Variations

Plain garlic bread? That’s merely your canvas.
- Cheeses melt, they stretch, they pull at the heart. Add them.
- Herbs and spices invite you to play, to experiment. Whisper secrets into your dough, and it shall whisper back in flavors.
Accompaniments and Pairings
What’s a table with just bread? A silent concert hall.
- The best accompaniments make your garlic bread sing. Think of the classics, the comfort foods that beckon for a sidekick.
- Pairings are about conversations, lively chats between sips and bites. Find the drink that listens well to your bread’s story.
Common Mistakes and How to Avoid Them
Overcooking and Burning
The line between perfectly toasted and tragically charred is fine:
- Watch for signs — a breadcrumb’s tan, the subtle change in scent. That’s when you act.
- Your oven is unique, listen to it, learn its ways, and adjust. There’s wisdom in those racks.
Underseasoning and Lack of Flavor
A bland sin, easily avoidable.
- Taste, then taste again. Season boldly, in layers, as if painting a masterpiece, a flurry of butter and garlic aligning just right.
- Strike the perfect balance — let neither garlic nor butter overshadow; this is a duet, not a solo performance.
Storing and Reheating Leftovers
Proper Storage Techniques
Keep leftover bread like treasure.
- Sealing in freshness isn’t alchemy; it’s practical magic. Plastic wrap, aluminum foil, decide what acts best as your bread’s guardian.
- Freezing and thawing. It’s a cycle and your kitchen knows this dance well.
Best Methods for Reheating
Bringing garlic bread back to life.
- Revisit the oven, or dare to microwave? Consider each’s merit — but always chase after what brought you joy originally.
- Embrace moisture, shield against dryness. Your bread deserves a second act as glorious as its first.
FAQ On How To Cook Costco Garlic Bread
What temperature should I bake Costco garlic bread at?
Heat your oven just right – a cozy 350 degrees Fahrenheit. It’s the sweet spot where each slice bakes up golden without scorching. Ovens can be fickle friends, so always check the middle rack for even browning.
How long does it take to cook Costco garlic bread?
Patience rewards you here. Give 15 to 20 minutes of your time, and that garlic bread will be crisp outside, soft inside – perfection. Keep an eye on it as it bakes; the kitchen timer is your ally.
Can you cook Costco garlic bread in a toaster oven?
Absolutely, and it’s a game-changer for just a few slices. Adjust the toaster oven to 350 degrees, place your slices in, and they’ll be ready before you know it. The result? A crispy crust with a taste that rivals any conventional oven.
Do I need to defrost Costco garlic bread before cooking?
Not at all; straight from freezer to oven works fine. If you’ve got time, let it thaw for even baking, but if impatience creeps in, just increase the baking time a bit. Either way, you’ll get that mouthwatering homemade taste.
What’s the best way to keep Costco garlic bread moist?
Here’s a secret: wrap that bread in aluminum foil. It traps steam and keeps each bite heavenly soft. Fancy a crispier edge? Unwrap for the last few minutes of baking. This way, you keep every texture-lover at your table happy.
Can I add extra toppings to Costco garlic bread?
Sure, let your culinary flag fly! Shredded Parmesan or a handful of chopped parsley could be marvelous guests atop that garlic goodness. They’ll add a fresh twist and a gourmet flair. Trust your taste buds – they know the party you want to throw.
What should I serve with Costco garlic bread?
Garlic bread adores company! Why not a simple spaghetti aglio e olio or a hearty minestrone soup? These pals compliment each other like stars in the sky – brilliantly.
How do you reheat leftover Costco garlic bread?
Bring back the magic by warming the leftovers back in the oven. Aim for 350 degrees for about 5 minutes. You want to revive it, not dry it out. It’s all about that second-chance sizzle.
Is Costco garlic bread suitable for vegetarians?
Costco’s garlic bread often gets the green light for vegetarians. It’s mostly bread, butter, and garlic. Still, scrutinize the label – if it sneaks in some Parmesan or other cheeses, ensure they align with vegetarian standards.
How can I make Costco garlic bread more flavorful?
Let’s talk flair. Try rubbing a fresh garlic clove on the bread before toasting. Or mix softened butter with extra minced garlic and spread it generously. Enhance with a sprinkle of Italian seasoning to taste. This isn’t just bread; it’s your canvas.
Conclusion
And there you have it, a golden crust embracing a warm heart, bursting with the aroma of minced garlic and melted butter – that’s our journey through how to cook Costco garlic bread wrapped up. You’ve learned the ropes, from the right oven settings to the allure of Italian herbs sprinkled with abandon.
- Revel in the crunch as you slice through your masterpiece.
- Savor the homemade feel of added Parmesan cheese melting on your tongue.
- Rejoice in the simplicity of a well-made side that complements any dish, especially the comforting embrace of a classic pasta.
So carry forth this knowledge, and let the oven’s warm glow be a beacon for your culinary adventures. May your dinner table always echo with contented murmurs and may your garlic bread – never forgotten – be a proclamation of your love for honest, good food.